ROS Serial on Arduino
Pi with Arduino
Let us see how we could set up the ROS serial communication between a Raspberry Pi and an Arduino board. So, our very first integration attempt is to integrate the Raspberry Pi with Arduino. We will use the Raspberry Pi 4. Let us break this down into the following steps:
- ROS on the Raspberry Pi 4
- Serial libraries on the Pi and Arduino
Raspberry Pi 4 Setup
It is pretty easy to get your hands on the Pi, so just go grab one and follow along.
The very first step with setting up your Pi is to install the base OS. You have many choices, but two of them stand out which is installing either Raspbian or Ubuntu. I prefer to run Ubuntu and ROS is very much compatible with Ubuntu, so why not!
Head over here and make sure to download the Ubuntu server 20.04 64 bit LTS version (we will use ROS Noetic which is based on Ubuntu 20.04 LTS)
After you have downloaded the image, head over here for a comprehensive installation instruction. It is pretty easy and straightforward!
Once you have your Raspberry Pi ready with Ubuntu 20.04, it is time to set up / install ROS! Since we have installed a headless Ubuntu, we need to first SSH into the Raspberry Pi. For this to work, you need to enable your Raspberry Pi network ready. Follow the instructions from here to make your Raspberry Pi visible to your home network.
TODO....
Serial libraries set up
First let us setup Arduino. Now you could do this on your Raspberry Pi 4 or any other computer. You need to install the Arduino IDE.
The idea here is that we need to be able to make your Arduino serial communication capable and for this we have to install a few ros based libraries. There is nothing more specific to the Raspberry Pi 4. You could do the below steps from the Raspberry Pi 4, but assume that your Raspberry Pi 4 will be the server (probably running in your NAVO), and you do not want to have any IDE running on your production server, so I would set up my Arduino IDE on my Ubuntu machine.
Follow the instructions from here to install Arduino IDE on Ubuntu. Make sure to download the appropriate Arduino IDE version for your Ubuntu version (For me it is Ubuntu 20.04). Get it installed as per the instructions!
The next step is to prepare and install the serial libraries that is required to make Arduino communicate with the Raspberry Pi. So for this, open a terminal window from the Ubuntu machine and run the following commands one after the other.
1sudo apt-get install ros-noetic-rosserial-arduino
1sudo apt-get install ros-noetic-rosserial
Make sure to replace the ROS version appropriately. For me it is Noetic!
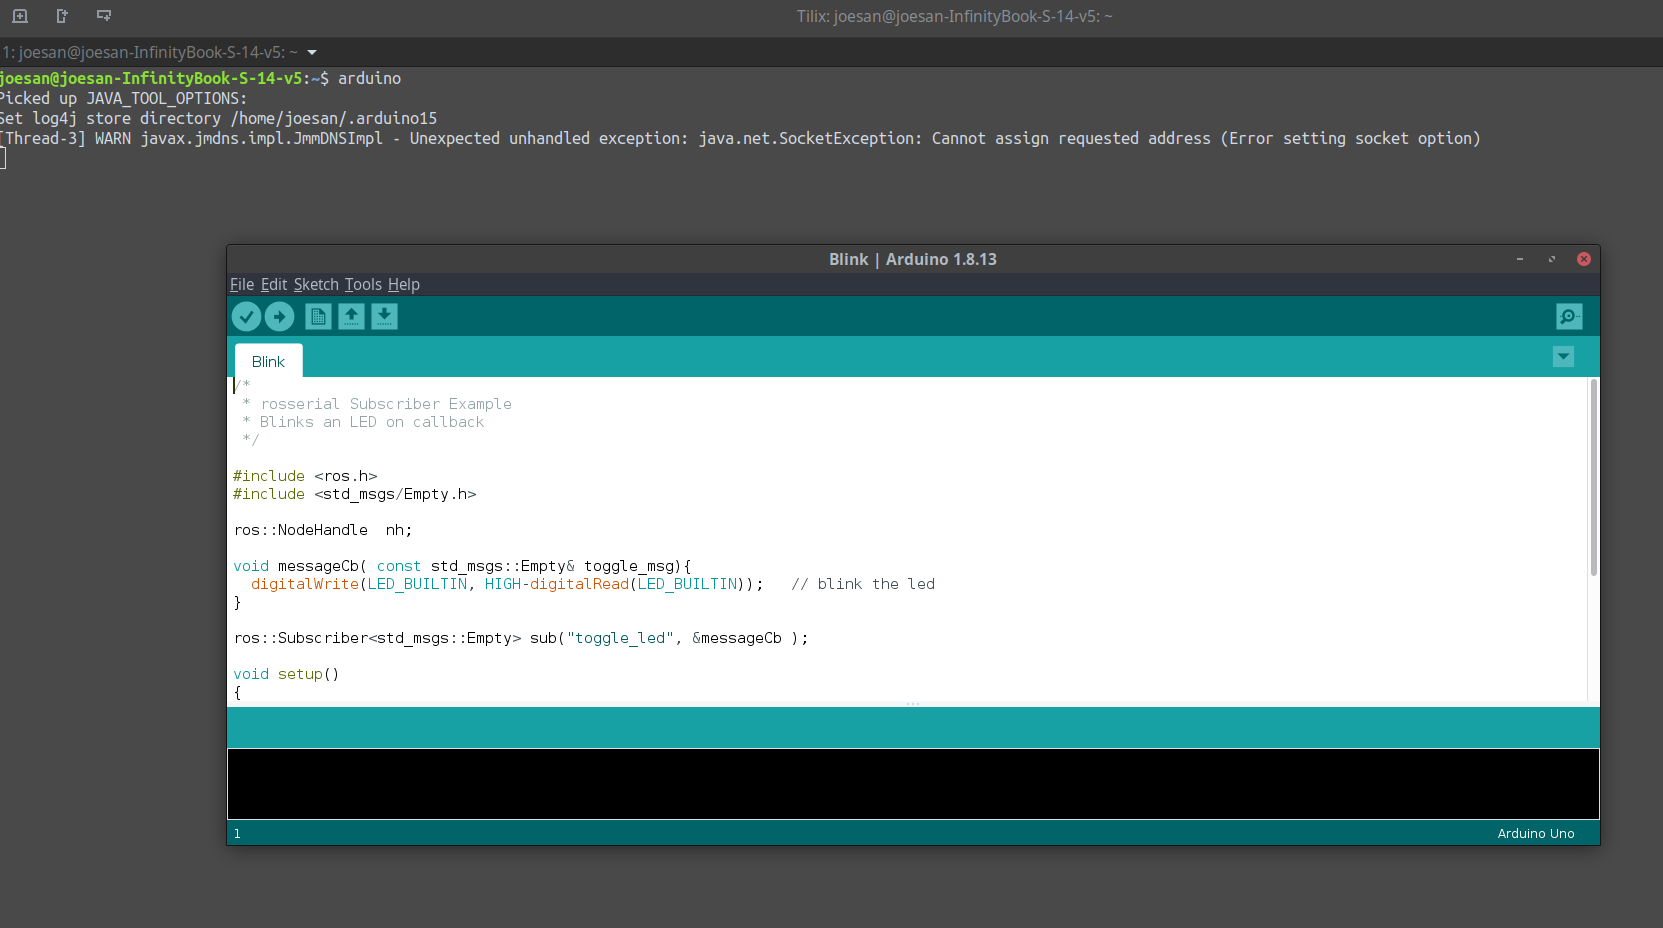
After this, fire up the Arduino IDE, by typing arduino from a terminal window (see the screenshot below)

After this, open a new terminal window and cd into the arduino folder, and then cd into libraries directory. From that libraries' directory, run the following command below. This command should build the needed libraries that will be used by ROS.
1joesan@joesan-InfinityBook-S-14-v5:~/Arduino/libraries$ rosrun rosserial_arduino make_libraries.py .
If we now type the dir command, we should see the following:
1joesan@joesan-InfinityBook-S-14-v5:~/Arduino/libraries$ dir
2readme.txt  ros_lib
As it can be seen that there is a new folder called ros_lib. That's all it with the setup. Let us now proceed to run some code in the Arduino. We will use some inbuilt program that will blink an LED upon receiving a message from a ROS publisher node.
Integration and test
Fire up the Arduino IDE, and Go to File -> Examples -> ros_lib and open the Blink sketch program.

Upload the code to Arduino. Make sure your Arduino is plugged into the USB port on your computer. To do this, either run Ctrl + U command from the Arduino IDE or Go to Sketch -> Upload which will then upload this program into your Arduino hardware.
Now it is time to test our setup. Open a terminal window on the Ubuntu machine and issue roscore command. TODO: THIS SHOULD BE RASPBERRY PI!!!!!!!!
1joesan@joesan-InfinityBook-S-14-v5:~$ roscore
In another terminal window, launch the ROS serial server. More information about the ROS serial server can be found here
1joesan@joesan-InfinityBook-S-14-v5:~$ rosrun rosserial_python serial_node.py /dev/ttyS0
Now let’s turn on the LED by publishing a single empty message to the /toggle_led topic. Open a new terminal window and type:
1joesan@joesan-InfinityBook-S-14-v5:~$ rostopic pub toggle_led std_msgs/Empty --once
On my machine, all the three commands above look like this. I'm using Tilix as my Terminal program. Note that additionally I'm tailing on the messages that gets published to the /toggle_led topic

I made a small video to see this peanut setup in action! Click the image below for the video!
That's all it. To shutdown your Arduino, just disconnect it from your computer's USB port!
Known Issues
While testing this setup, I faced some issues with the ros serial library:
 1In file included from /home/user/Arduino/libraries/Rosserial_Arduino_Library/src/std_msgs/Time.h:7:0,
 2  from /home/user/Arduino/libraries/Rosserial_Arduino_Library/src/ros/node_handle.h:40,
 3  from /home/user/Arduino/libraries/Rosserial_Arduino_Library/src/ros.h:38,
 4  from /home/user/Arduino/libraries/Rosserial_Arduino_Library/examples/Blink/Blink.pde:6:
 5  /home/joesan/Arduino/libraries/Rosserial_Arduino_Library/src/ros/msg.h:40:10:
 6  fatal error: cstring: No such file or directory
 7    #include <cstring>
 8              ^~~~~~~~~
 9   compilation terminated.
10   exit status 1
11   Error compiling for board Arduino Uno.
To resolve this, do the following:
- Delete the ros_lib folder which is to be found under /home/user/Arduino/libraries/ (here user is your logged-in username)
- Then open the Arduino IDE, in the menu bar go to Tools -> Manage Libraries and search for "rosserial"
- You should see Rosserial Arduino Library by Michael Furguson
- Make sure to install the 0.7.9 version
Hope it made sense!
